How I created a CorDapp in 3 Steps: Part One
April 17, 2020

Corda Developer at PruTech Solutions, Inc.
Prepared By: Sonal Dhinoja
Reviewed By: Birender Saini and Rajapandian Chellimuthu
The article is part one of a series on building a CorDapp. It will take you through all you need to know to develop your first CorDapp (application built on Corda).
If you are completely new to Corda, I wrote a previous article on Linkedin that answers more questions about Corda as well.
And here is the other article, where I have tried to answer basic questions on a learning path for Corda. “How to Get started learning Corda: 10 Beginners FAQs“.
Step 1: Installation and setup
First, we need to ensure we have all the pre-requisites installed. Those are:
Java 8 JVK – We require at least version 8u171, but do not currently support Java 9 or higher.
IntelliJ IDEA – IntelliJ is an IDE that offers strong support for Kotlin and Java development. We support versions 2017.x, 2018.x and 2019.x (with Kotlin plugin version 1.2.71).
Git – Git to download the templates and push your CorDapp as a repository.
Gradle – Install Gradle version 5.4.1. If you are using a supported Corda sample, the included gradle script should install Gradle automatically.
Our use-cases:
BookMyStay is an online hotel booking service which allows its customer to book rooms online with HotelHeaven’s hotel chain. As per the agreement, BookMyStay collects certain information from its customers and sends it to HotelHeaven. HotelHeaven in return sends an acknowledgement to BookMyStay. So, here I demonstrate how to build an application ‘BookingCorDapp’ for BookMyStay.
There are two parties in BookingCorDapp.
- BookMyStay
- HotelHeaven
BookMyStay will send the following details to HotelHeaven to book a stay as requested by the customer.
- Customer Name, Customer Age
- Check in Date, Check out Date
- Room Type, Original Room Rate
- Merchant Credit Card Number, Credit Card exp date.
- Credit Card Amount (After 15% commission deduction on room rate)
7 constraints should be met before sending booking details to HotelHeaven:
- Customer age should be greater than 18.
- Check in and check out date should be future dates.
- Check out date should be later than check in date.
- Room type format must be: K, NK, DD, NDD
- After commission price should 85% of original room price.
- Credit card number length should be 16.
- Credit card expiration date should not be in the past.
Let’s get our hands dirty: Now, let us create our CorDapp using The CorDapp Template. For that, we have to download the Corda template from GitHub and import into IntelliJ. The standard template can be downloaded from the below link:
Once the template is downloaded, open it in IntelliJ by following the instructions here:
- Open IntelliJ
- The splash screen will appear. Click open, navigate to and select the cordapp-example folder, and click OK
- Once the project is open, click File, then Project Structure. Under Project SDK:, set the project SDK by clicking New…, clicking JDK, and navigating to C:\Program Files\Java\jdk1.8.0_XXX on Windows or Library/Java/JavaVirtualMachines/jdk1.8.XXX on MacOSX (where XXX is the latest minor version number)
- Click Apply followed by OK.
- Again under File then Project Structure, select Modules. Click +, then Import Module, then select the corDapp-example folder and click Open. Choose to Import module from external model, select Gradle, click Next then Finish (leaving the defaults) and OK
- Gradle will now download all the project dependencies and perform some indexing. This usually takes a minute or so.
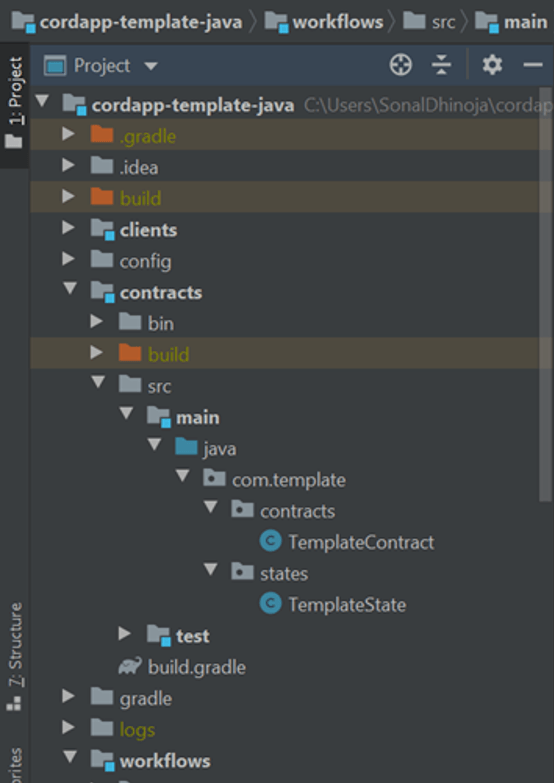
The Gradle project contains 3 main modules:

- Contracts: It defines the contractual validity of the CorDapp. You can read more about it here. States are created in the same module, the actual information is stored in the ledger.
- Workflows: The flows enable automated agreeing to the ledger states. Detailed documentation can be found on the Corda website.
- Clients: The client defines classes that can be used to interact with the CorDapp in a production environment.
Setup – CorDapp environment using build.gradle:
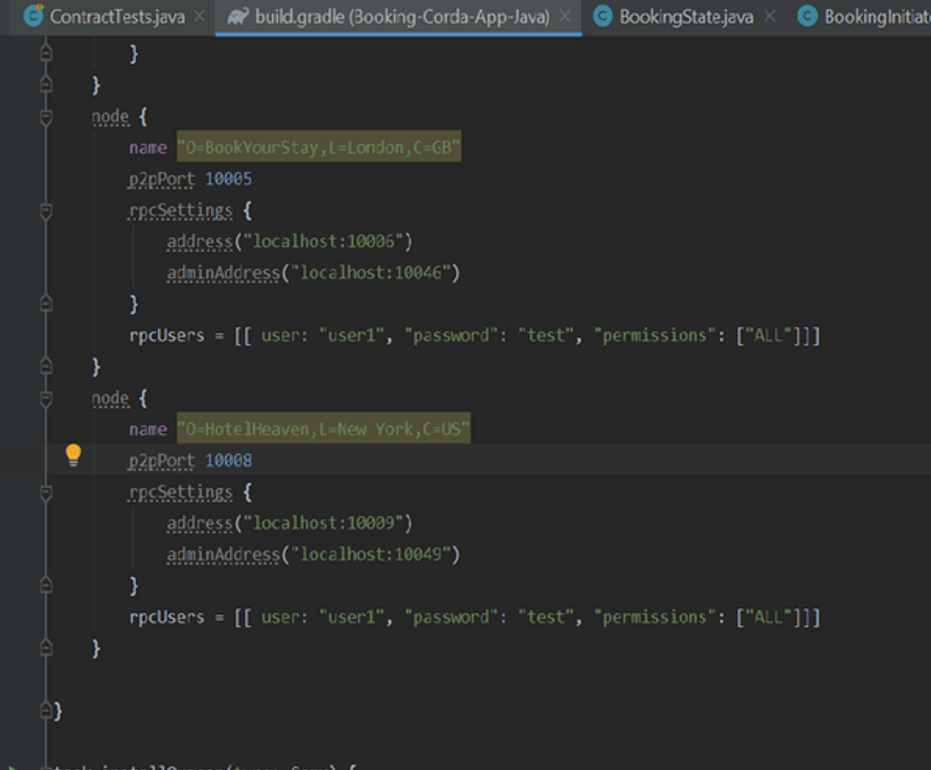
Define the Corda Network. Our Booking Application has two Parties and a Notary. We define this network configuration in the deployNodes task of the gradle build file. From PartyA and PartyB, we will change it to BookMyStay and HotelHeaven.

Now we have our platform ready and we are ready to code!
We will continue in the next article: “Steps to build BookingCorDapp “.